
Disclosure: This article contains Amazon affiliate links. We receive a small commission from your purchase at no additional cost to you.
Did you know that starting seeds during the winter months can lead to a flourishing spring garden? It may seem counterintuitive to plant seeds when the temperatures are cold and daylight is limited, but with the right techniques, you can jumpstart your garden and enjoy an early and abundant harvest.
In this section, we will explore some creative ideas for seed starting in winter, as well as provide essential tips and tricks to ensure successful germination and healthy plant growth. Whether you’re an experienced gardener looking to extend your growing season or a beginner eager to try your hand at winter gardening, this guide will equip you with the knowledge to prepare your seeds indoors and prepare for a bountiful spring garden.

Key Takeaways:
- Starting seeds during winter can result in a thriving spring garden.
- Winter seed starting requires specific techniques and practices for successful germination.
- With the right planning and care, you can enjoy an early and abundant harvest.
- Winter gardening allows you to extend your growing season and maximize your garden’s potential.
- Stay tuned to discover the best practices for winter seed starting and spring planting preparation.
Choosing the Right Seeds for Winter Sowing
Before we dive into the exciting world of winter seed starting, it’s crucial to choose the right seeds for the task at hand. By selecting the appropriate seeds, you can ensure a successful indoor planting experience during the colder months and have a head start on preparing for spring planting.
Here are some popular vegetables that can be successfully started indoors during winter:
- Broccoli
- Carrots
- Beets
- Onions
In addition to vegetables, you can also kickstart the growth of beautiful flowers and aromatic herbs. Consider trying your hand at starting these seeds indoors:
“Banana peppers add a zesty kick to dishes, and starting the seeds indoors during winter ensures a robust and early harvest.”
Remember, the seeds you choose should align with your gardening goals and the climate in your area. If you’re unsure, consult your local nursery or experienced gardeners to get recommendations specific to your region.
Now that we’ve discussed the importance of selecting the right seeds for winter sowing, let’s move on to the next step: finding the ideal containers for your indoor seed starting adventure.
Stay tuned for Section 3: “Ideal Containers for Winter Seed Starting” where we’ll guide you through the various containers and grow bags suitable for nurturing your winter-started seedlings.
Ideal Containers for Winter Seed Starting
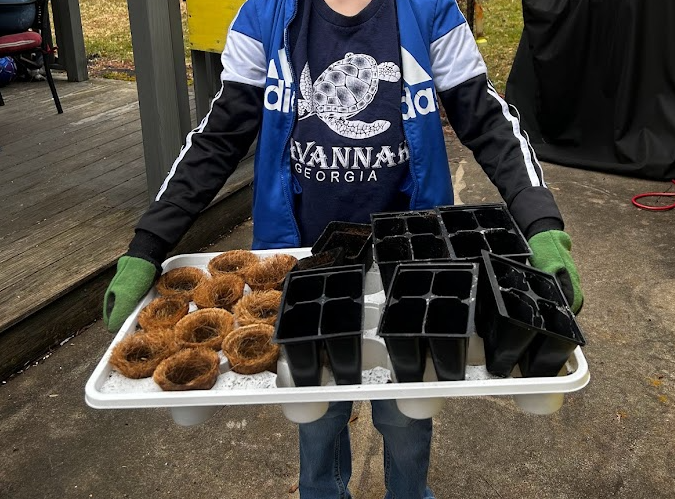
When it comes to indoor seed starting during the winter months, choosing the right containers is essential for the success of your seedlings. Different types of containers and grow bags offer various benefits and drawbacks. Let’s explore these options and find the ideal containers for your seedlings.
Growing containers:
Traditional pots and containers are popular choices for starting seeds indoors. They come in a variety of sizes and materials, such as plastic, terracotta, or biodegradable materials like peat pots. Consider the following factors when selecting growing containers:
- Size: Opt for containers with enough room for root growth. Small containers can restrict the growth of your seedlings.
- Drainage: Ensure that the containers have proper drainage holes to prevent waterlogged soil, which can lead to root rot.
- Reusable or biodegradable: Choose between reusable containers that can be sterilized for future use or biodegradable options that can be planted directly into the ground.
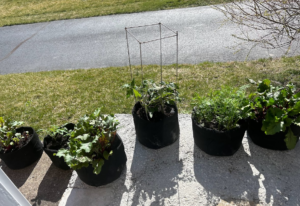
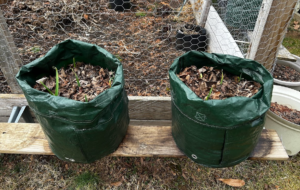
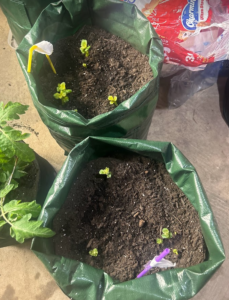
Grow bags:
Grow bags are a flexible and portable alternative to traditional pots. They are made of lightweight fabric, allowing for better air circulation and root pruning. Here are some advantages of using grow bags:
- Aeration: The breathable fabric promotes aeration, preventing the roots from becoming waterlogged.
- Root development: Grow bags prevent root circling, promoting healthier root systems and preventing transplant shock.
- Portability: The lightweight design makes it easier to move your seedlings around, optimizing light exposure and temperature control.
If you have a large number of seeds to start, seed starting trays are an efficient option. These trays usually have individual cells or compartments for each seed, providing the ideal environment for germination. Consider the following when using seed starting trays:
- Uniformity: Seed starting trays ensure consistent moisture levels and temperature, facilitating even germination across all cells.
- Space-saving: By compactly arranging seedlings in trays, you can make the most of limited indoor space.
- Easy transplanting: Once your seedlings have grown, they can be easily transplanted into larger containers or directly into the garden.
Remember, regardless of the containers you choose, it’s important to use a high-quality potting mix specifically formulated for seed starting. This will provide the essential nutrients and drainage for healthy seedling growth.

| Container Type | Advantages | Disadvantages |
|---|---|---|
| Growing Containers | – Comes in various sizes and materials – Reusable options available – Easy to monitor seedling growth |
– Requires regular watering – May restrict root growth if too small |
| Grow Bags | – Promotes better air circulation – Prevents root circling – Lightweight and portable |
– Can dry out more quickly – May require additional support |
| Seed Starting Trays | – Ensures consistent moisture and temperature – Space-saving design – Easy to transplant |
– Limited space for root growth – Seedlings may need to be separated |
By selecting the ideal containers for your indoor seed starting, you can provide a nurturing environment for your seedlings during the winter months. Experiment with different containers to find what works best for you and watch your seedlings thrive.
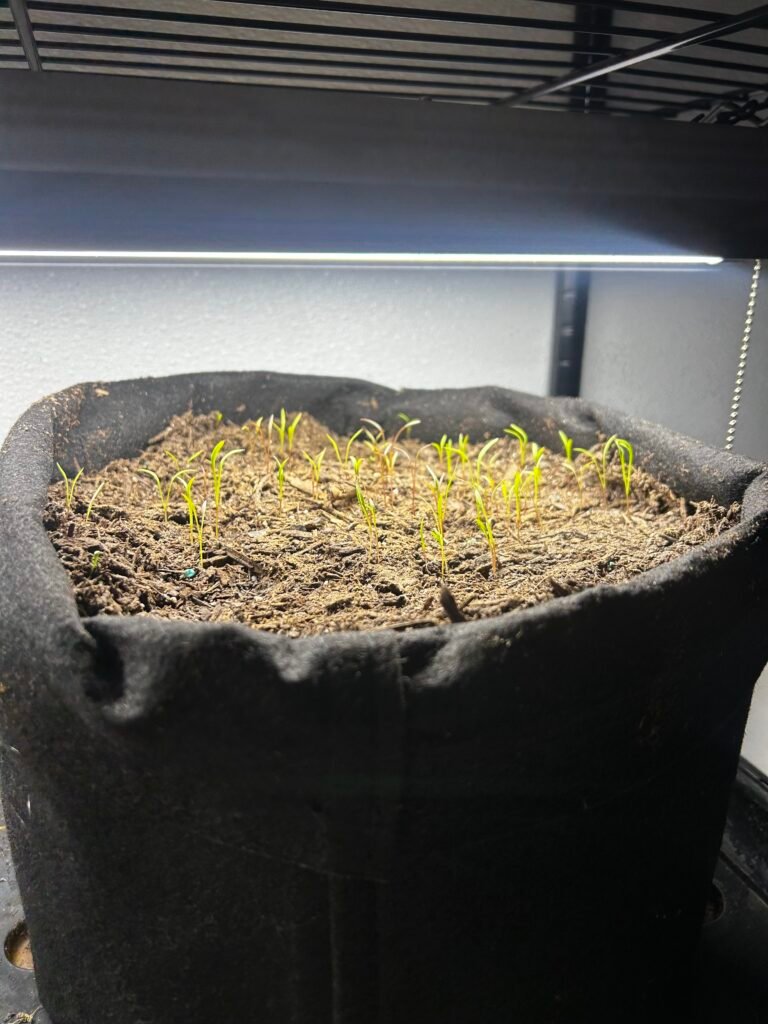
The Importance of Grow Lights in Winter Seed Starting
When it comes to successful seed starting in winter, one crucial factor often overlooked is the importance of adequate lighting. As daylight hours are shorter during this season, providing your seedlings with sufficient light is essential for their growth and development. In this section, we will explore why grow lights are a valuable investment and how they can help you achieve thriving seedlings for your spring garden.
Why Grow Lights Matter
Growing seedlings indoors during winter presents unique challenges, including limited natural light. While windowsills can provide some illumination, it is often insufficient for optimal plant growth. This is where grow lights become indispensable. They supplement natural light, ensuring your seedlings receive consistent and powerful illumination throughout the day.
“Grow lights supplement natural light, ensuring your seedlings receive consistent and powerful illumination throughout the day.”
Grow lights mimic the sun’s spectrum, providing the necessary wavelengths of light needed for photosynthesis. This promotes robust growth, sturdy stems, and healthy foliage. With grow lights, your seedlings won’t experience stunted growth or elongation, which can occur in low-light conditions.
Types of Grow Lights
There are various types of grow lights available, each with its advantages and applications:
- Fluorescent Lights: Fluorescent lights are a popular choice for indoor seed starting. They are energy-efficient, emit low heat, and are suitable for most types of plants. These lights come in two types: T5 and T8, with T5 being more efficient.
- LED Lights: LED lights are highly energy-efficient and produce minimal heat. They offer a wide spectrum of light and can be customized to specific wavelengths, promoting targeted plant growth. Although initially more expensive, they have a longer lifespan and can save you money in the long run.
- High-Intensity Discharge (HID) Lights: HID lights, such as metal halide (MH) and high-pressure sodium (HPS) lights, produce intense light output. They are ideal for larger seedling setups or commercial gardens.
When selecting grow lights, consider the size of your indoor gardening space, the number of seedlings you plan to grow, and your budget. Each type of grow light has its pros and cons, so choose one that best suits your specific needs.
Using Grow Lights Safely
While grow lights are crucial for winter seed starting, it’s important to use them safely:
- Follow the manufacturer’s instructions for installation and usage.
- Position the lights at an adequate distance from the seedlings to prevent heat damage or light burns.
- Adjust the height of the lights as the seedlings grow to maintain an optimal distance.
- Use a timer to ensure consistent light cycles and prevent overexposure or insufficient lighting.
By incorporating these safety measures, you can provide your seedlings with the ideal lighting conditions to thrive during winter.
With the right grow lights, you can overcome the light limitations of winter and give your seedlings the best chance at strong, healthy growth. In the next section, we will delve into valuable tips for ensuring successful winter seed germination, further enhancing your spring garden’s potential.
Tips for Successful Winter Seed Germination
When it comes to starting seeds indoors during the winter, proper techniques can make all the difference in achieving successful germination. Here are some valuable tips and tricks to increase your chances of success:
- Prepare the soil: Before sowing your seeds, ensure that the soil is loose, well-draining, and rich in nutrients. This can be achieved by using a high-quality seed starting mix or a combination of potting soil, vermiculite, and perlite.
- Provide adequate moisture: The key to successful seed germination is maintaining consistent moisture levels. Keep the soil moist but not waterlogged to prevent the seeds from rotting. Consider using a spray bottle or a misting tool to avoid excessive watering.
- Control temperature and humidity: Different seeds have different temperature and humidity requirements for germination. Research the optimal conditions for the specific seeds you are starting and consider using a seedling heat mat or a humidifier to create the ideal environment.
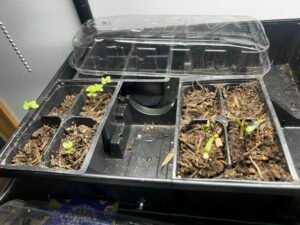
- Use a germination dome: A germination dome or a plastic cover can create a mini greenhouse effect, trapping moisture and heat to promote faster seed germination. Keep an eye on the moisture levels inside the dome and remove it once the seedlings emerge.
Remember to label your seed trays or containers to keep track of the different varieties you are growing. Patience is key, as germination times can vary depending on the type of seed. Monitor your seedlings closely and provide them with proper care and attention as they grow.
“Successful winter seed germination requires attention to detail and providing the right growing conditions. By following these tips, you can increase your chances of cultivating strong and healthy seedlings for your spring garden.”


| Seed | Germination Temperature | Germination Time |
|---|---|---|
| Tomatoes | 70-85°F (21-29°C) | 5-10 days |
| Lettuce | 60-70°F (15-21°C) | 7-14 days |
| Peppers | 75-85°F (24-29°C) | 10-14 days |
| Herbs (Basil, Parsley, etc.) | 65-75°F (18-24°C) | 7-21 days |
Monitoring Seedlings
Once your seeds have germinated, it’s important to monitor their progress closely. Look for signs of healthy growth, such as the development of true leaves and sturdy stems. Adjust the lighting and humidity levels as needed, and provide them with adequate space to prevent overcrowding and competition for resources.
Proper care and attention during the germination period will set the foundation for strong and vigorous plants. Follow these tips and watch your winter-started seedlings thrive, preparing them for a successful transition to your spring garden.
Caring for Winter-Started Seedlings
Once your seeds have germinated, it’s time to provide the proper care necessary for your winter-started seedlings to thrive and prepare for spring planting. This crucial stage in the seed starting process requires attention to detail and a few essential practices to ensure healthy growth and robust plants.
Fertilization:
Feeding your winter-started seedlings with the right nutrients is vital for their overall health and development. Begin fertilizing two weeks after germination using a balanced, water-soluble fertilizer diluted according to the package instructions. We use Neptunes Harvest Tomato and Veg fertilizer. Remember, seedlings have delicate roots, so it’s crucial to apply fertilizers gently and avoid overfeeding to prevent burning the young plants.
Transplanting:
As your seedlings grow, they’ll eventually outgrow their initial containers and require transplantation into larger pots or the outdoor garden beds. Transplanting should be done when the seedlings have developed a set of true leaves, typically 2-3 weeks after germination. Gently remove the seedlings from their original pots or trays, taking care not to damage the roots. Plant them in their new containers or garden beds, ensuring they are at the same depth as before. Water thoroughly after transplanting to help the seedlings establish new root systems.
Protection from Cold Drafts:
During the winter months, it’s essential to protect your winter-started seedlings from cold drafts. Cold air ventilation can stunt their growth and potentially cause damage. Place your seedlings in a cozy and draft-free location, such as a greenhouse, enclosed porch, or near a sunny window indoors. If necessary, use row covers or horticultural fleece to shield your seedlings from frost and maintain a stable temperature.
To summarize, proper care for your winter-started seedlings involves fertilizing with caution, transplanting at the right time, and protecting them from cold drafts. By following these key practices, you’ll provide the optimal conditions for your seedlings to flourish and grow into strong, healthy plants ready for the upcoming spring planting season.

| Winter Seedling Care Checklist |
|---|
| – Apply a balanced, water-soluble fertilizer two weeks after germination |
| – Transplant seedlings into larger containers or outdoor garden beds after 2-3 weeks |
| – Protect seedlings from cold drafts by placing them in a draft-free location |
Conclusion
In our journey through winter seed starting ideas, we have explored various aspects of successfully starting seeds during the colder months to get ready for spring planting. By implementing these tips and techniques, you can unlock the potential of your spring garden and enjoy a bountiful harvest in the months to come.
From choosing the right seeds for winter sowing to utilizing ideal containers for indoor germination, we have provided valuable insights on how to kickstart your gardening journey. Additionally, we discussed the importance of proper lighting and shared essential tips for successful seed germination and caring for winter-started seedlings.
With the right preparation and a little bit of patience, you can give your plants a head start and ensure a fruitful spring planting season. So gather your supplies, prepare your seeds, and embark on the exciting adventure of winter seed starting. Your thriving spring garden awaits!
FAQ
What are some seed starting ideas for winter?
How can I prepare for spring planting during the winter?
Should I start my seeds indoors during winter?
What are some popular vegetables, flowers, and herbs that can be started indoors during winter?
What types of containers can be used for winter seed starting?
Why are grow lights important for winter seed starting?
How can I ensure successful seed germination during winter?
What should I do to care for winter-started seedlings?

Such good advice! Easy instructions.
Great post! Definitely saving!
I’ve always wanted to grow my own veggies indoors but am always so unsure and to what to do. This was a very informative post for me.
These are amazing tips. Thanks for putting together such a comprehensive guide to get started with seeds. 🙂
Great information! Thanks for sharing!